> ## Documentation Index
> Fetch the complete documentation index at: https://docs.smtpexpress.com/llms.txt
> Use this file to discover all available pages before exploring further.
# Quickstart Guide
> In this guide, you will learn how to create a project, test email delivery using Quick Send and interact with the Send API — all in under 5 minutes!
## Step 1: Set Up Your First Project
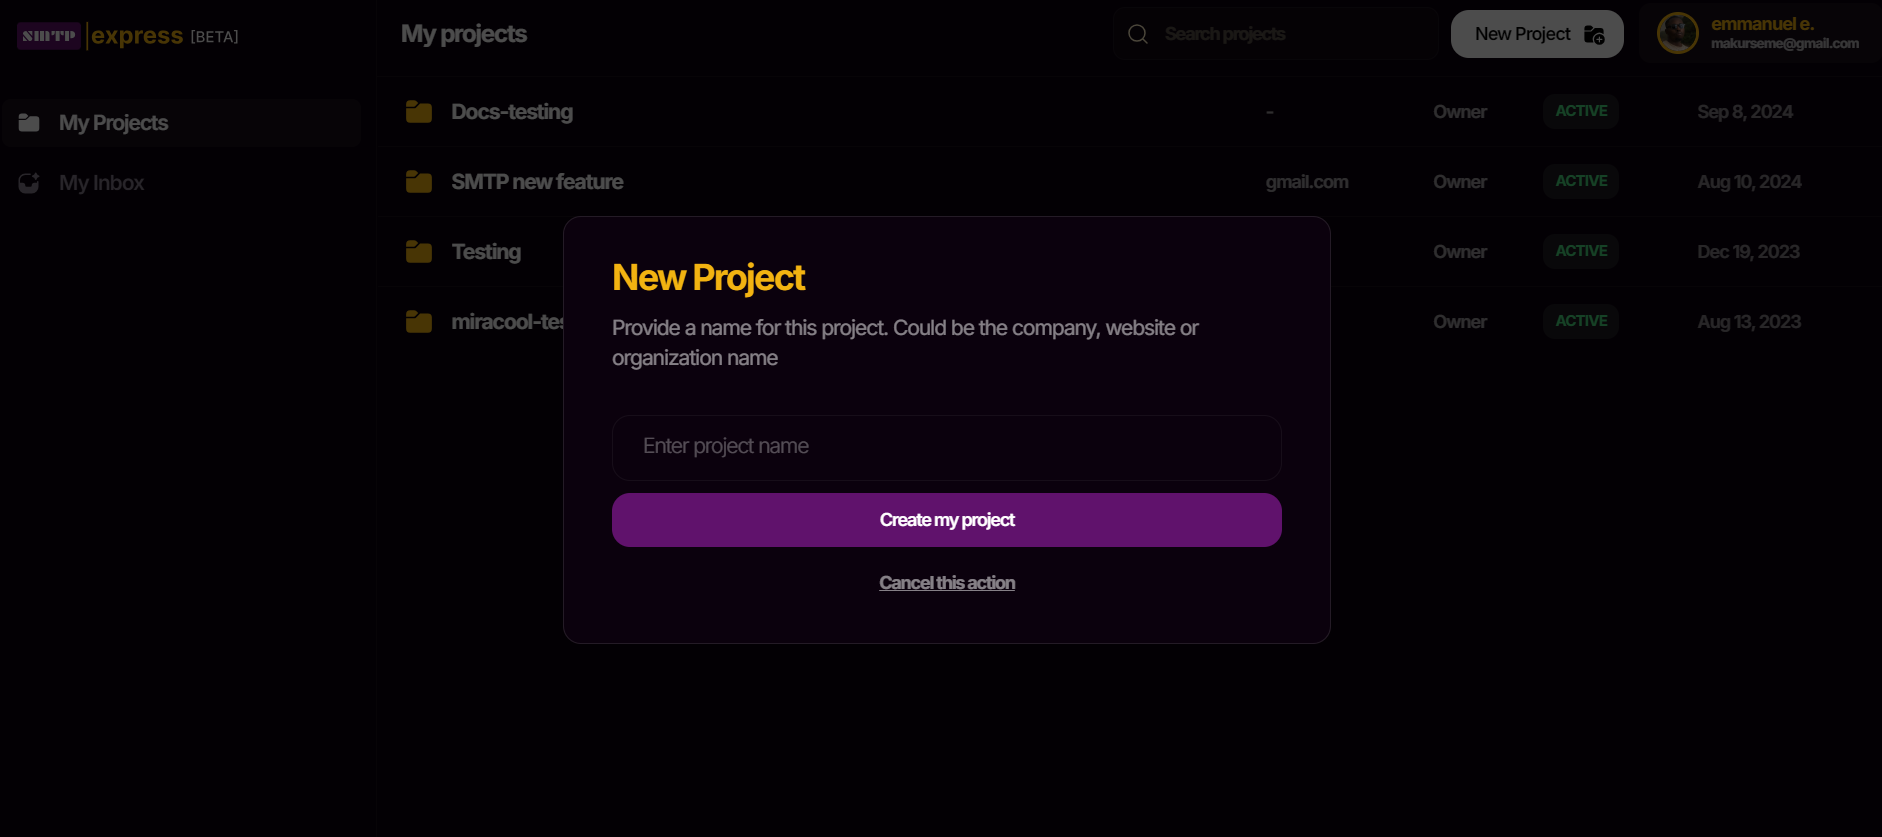
A project is where all your emailing activities take place. We like to think of it as creating your mail server. If you haven't already, you'll need to [sign up for an account](https://smtpexpress.com/signin) before you can proceed. Once signed in, click `New Project`, provide a name that's reflect's your project's purpose, then hit Enter.
 ## Step 2: Send Your First Email Using Quick Send
Now that your project is set up, you’ll find yourself on the project dashboard. Let’s test things out!
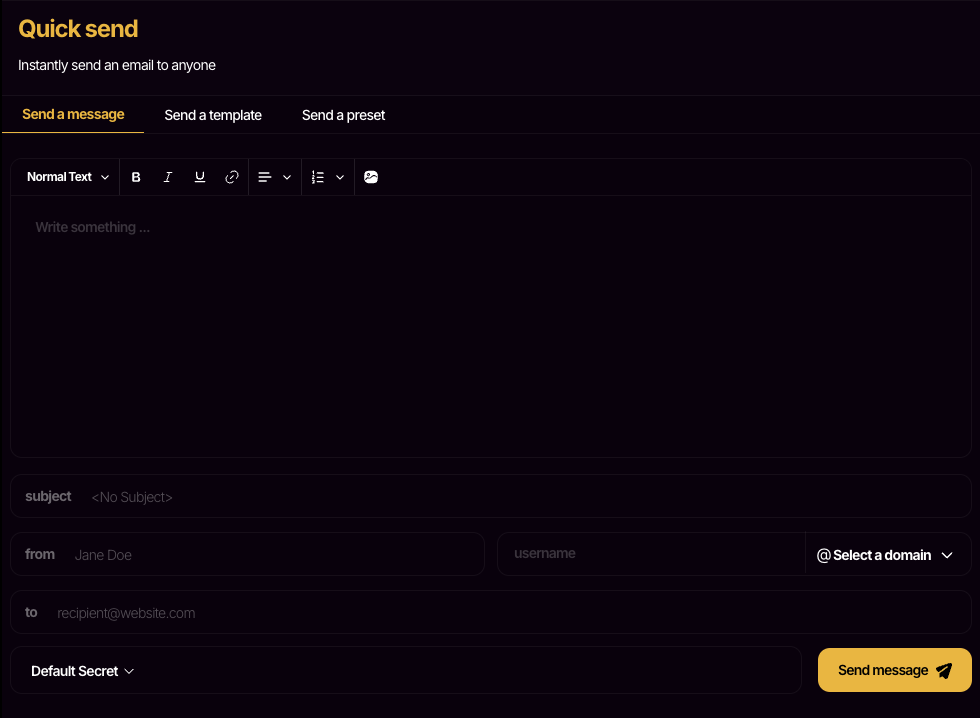
Click the `Quick Send` button to compose a message. You can use your personal email as the recipient for this email. Once you’ve written your email, hit Enter to send it directly to your inbox.
Simple, right?
## Step 2: Send Your First Email Using Quick Send
Now that your project is set up, you’ll find yourself on the project dashboard. Let’s test things out!
Click the `Quick Send` button to compose a message. You can use your personal email as the recipient for this email. Once you’ve written your email, hit Enter to send it directly to your inbox.
Simple, right?
 ## Step 3: Connecting with the Send API
For context, we provide you with a default sender address in the form of `@smtpexpress.email` which you will recognize as the sender of the email you received. You can learn more about [changing your sender address.](https://smtpexpress.com/signin)
Head back to your project overview where you will see your `Sender Address` alongside two other credentials; Your `Project ID` and your `Project Secret`.
## Step 3: Connecting with the Send API
For context, we provide you with a default sender address in the form of `@smtpexpress.email` which you will recognize as the sender of the email you received. You can learn more about [changing your sender address.](https://smtpexpress.com/signin)
Head back to your project overview where you will see your `Sender Address` alongside two other credentials; Your `Project ID` and your `Project Secret`.
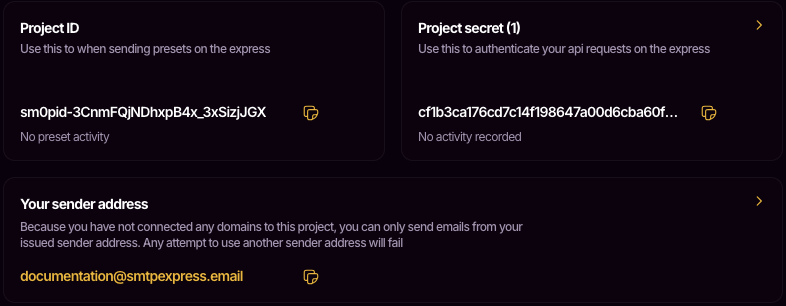 For this example, we only require the project secret and the sender address. Your project secret is used to authorize your requests to the Send API. Here's a quick code example:
```javascript Javascript theme={null}
// npm install smtpexpress
import { createClient } from "smtpexpress"
const smtpexpressClient = createClient({
projectId: "",
projectSecret: ""
});
smtpexpressClient.sendApi.sendMail({
subject: "My first email using the Send API",
message: "Hello from the Express!"
sender: {
name: "SMTP Express User",
email: ""
},
recipients: "",
})
```
```shell cURL theme={null}
curl -XPOST 'https://api.smtpexpress.com/send' \
-H 'Authorization: Bearer ' \
-H "Content-type: application/json" \
-d '{
"subject": "My first email using the Send API",
"message": "Hello from the Express!",
"sender": {
"name": "SMTP Express User",
"email": ""
},
"recipients": ""
}'
```
For this guide, use the sender address ending with `smtpexpress.email` that’s listed in your project overview. Attempting to use another email address will result in a failed request. Want to send from your own domain? [Here's how to connect your domain](/essentials/domains)
## Next Steps
Congratulations! Now that you've gotten a feel of the Send API and how to send emails using SMTP Express, you can take your time to explore the rest of the platform or take a deeper dive into what SMTP Express has to offer.
Learn more about using the Send API to power your entire mailing activity.
Personalize your sender address to match your business' website.
For this example, we only require the project secret and the sender address. Your project secret is used to authorize your requests to the Send API. Here's a quick code example:
```javascript Javascript theme={null}
// npm install smtpexpress
import { createClient } from "smtpexpress"
const smtpexpressClient = createClient({
projectId: "",
projectSecret: ""
});
smtpexpressClient.sendApi.sendMail({
subject: "My first email using the Send API",
message: "Hello from the Express!"
sender: {
name: "SMTP Express User",
email: ""
},
recipients: "",
})
```
```shell cURL theme={null}
curl -XPOST 'https://api.smtpexpress.com/send' \
-H 'Authorization: Bearer ' \
-H "Content-type: application/json" \
-d '{
"subject": "My first email using the Send API",
"message": "Hello from the Express!",
"sender": {
"name": "SMTP Express User",
"email": ""
},
"recipients": ""
}'
```
For this guide, use the sender address ending with `smtpexpress.email` that’s listed in your project overview. Attempting to use another email address will result in a failed request. Want to send from your own domain? [Here's how to connect your domain](/essentials/domains)
## Next Steps
Congratulations! Now that you've gotten a feel of the Send API and how to send emails using SMTP Express, you can take your time to explore the rest of the platform or take a deeper dive into what SMTP Express has to offer.
Learn more about using the Send API to power your entire mailing activity.
Personalize your sender address to match your business' website.